Error 404 Blogger not found

My my its been fully SIX months since I last posted! I’ll fill you in on what I’ve been up to, but first I have to share my latest make.

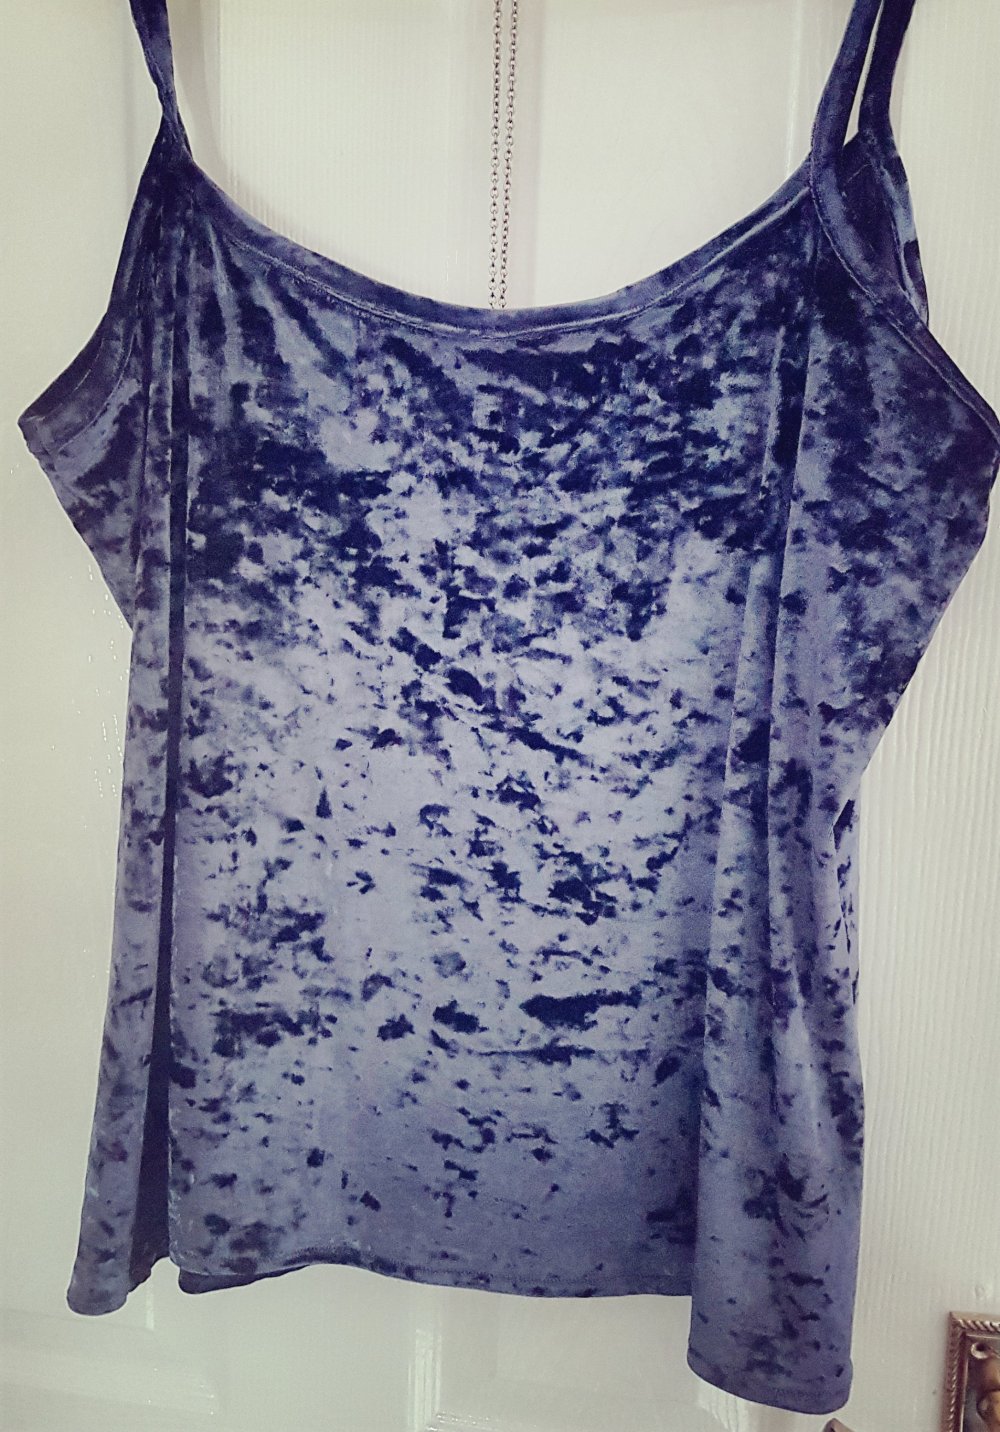
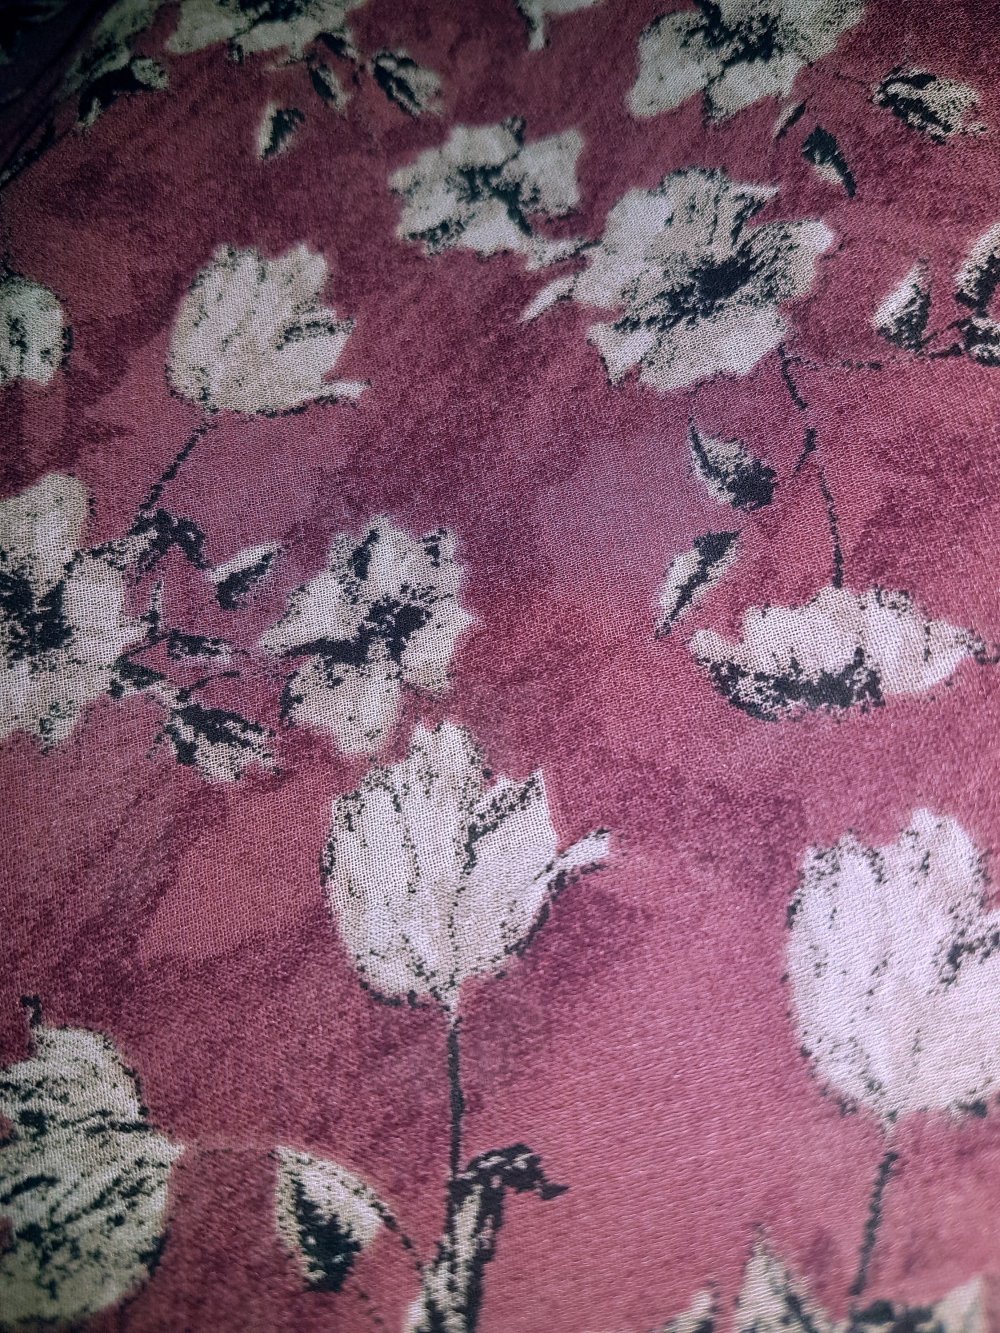
I have been wanting a stretch velvet sweatshirt for some time. I picked up some lovely stretch velvet remnants at Abakhan and have used P4P’s Relaxed Raglan.

A loose fitting raglan top with several options. I opted for the long sleeves with cuffs and banded waist for a traditional sweatshirt shape.

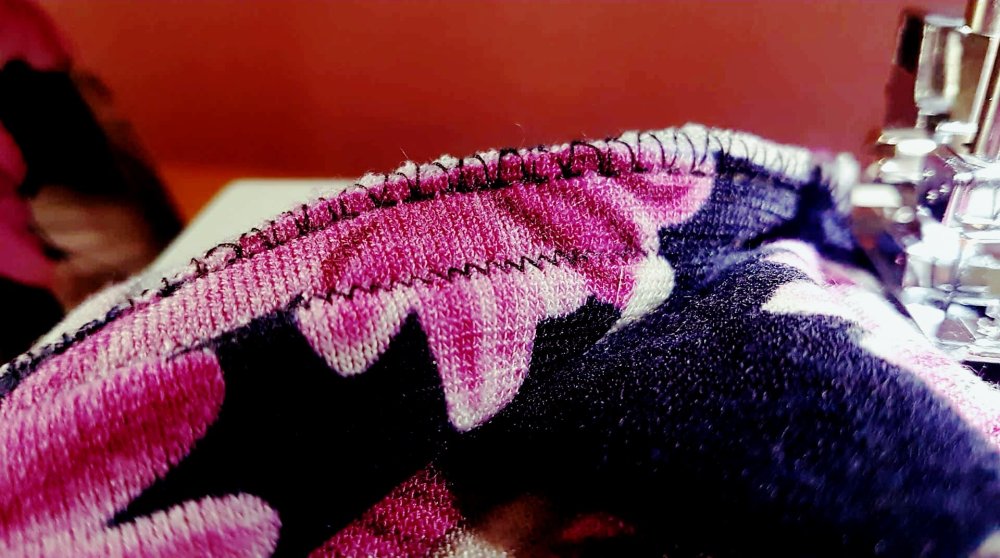
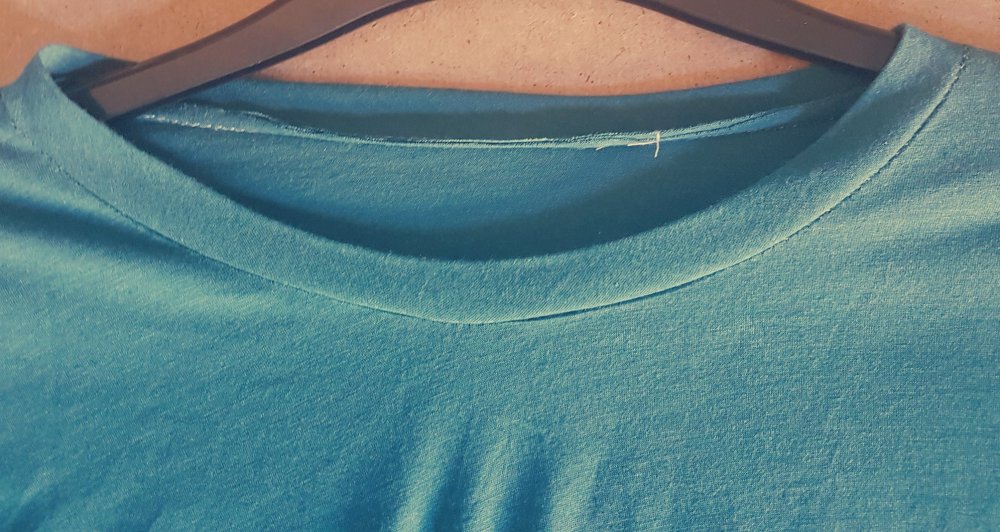
I will say that stretch velvet is really hard to work with. I have used it once before but this time was much more difficult. Cutting it with scissors results in jagged edges but the real problem came with sewing it.

I had a lot of trial and error with the needles and the size of the stitches. When attaching the band and cuffs I had hours of thread snapping, error messages and worst of all SLIPPAGE.

The fabric would not stay straight and the top layer kept slipping half an inch to the side whilst I was sewing. It was very frustrating and I’ll be honest I am not in a hurry to make another garment exclusively from stretch velvet.

My advice is hand baste all your seams before you even try machine stitching them. Also test out different stitch lengths on a scrap until you find the right one. And sew slowly, impatience will not pay off here ๐Ÿ˜’

Having said all that its actually turned out beautifully and is exactly what I wanted.

๐ŸŒผ๐ŸŒผ๐ŸŒผ๐ŸŒผ๐ŸŒผ๐ŸŒผ๐ŸŒผ๐ŸŒผ๐ŸŒผ๐ŸŒผ๐ŸŒผ๐ŸŒผ

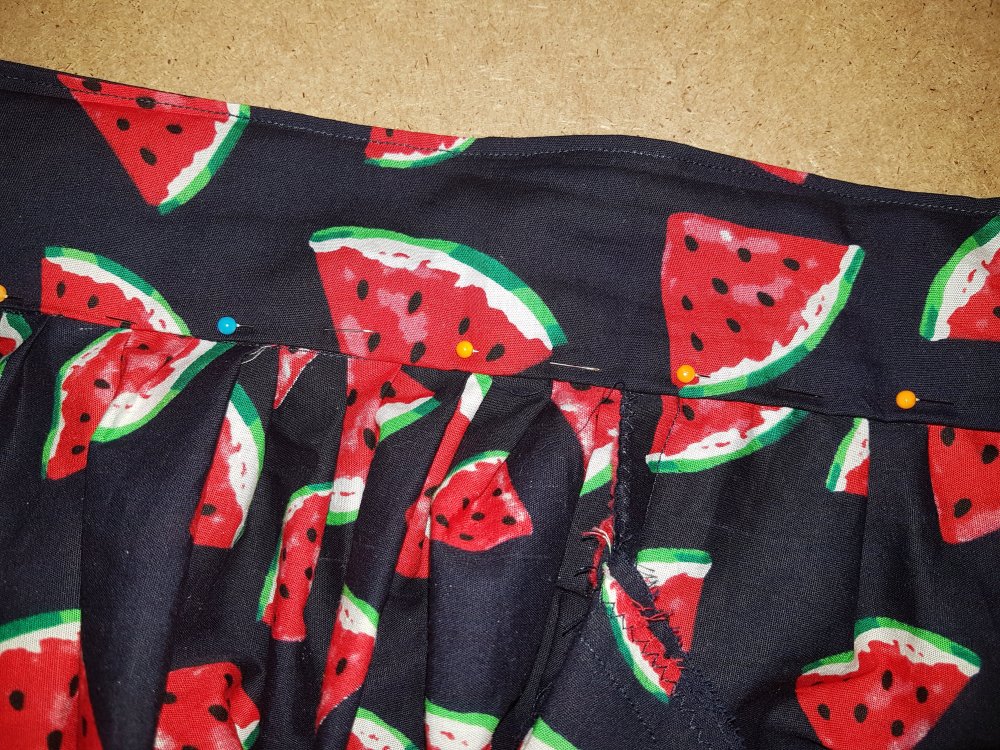
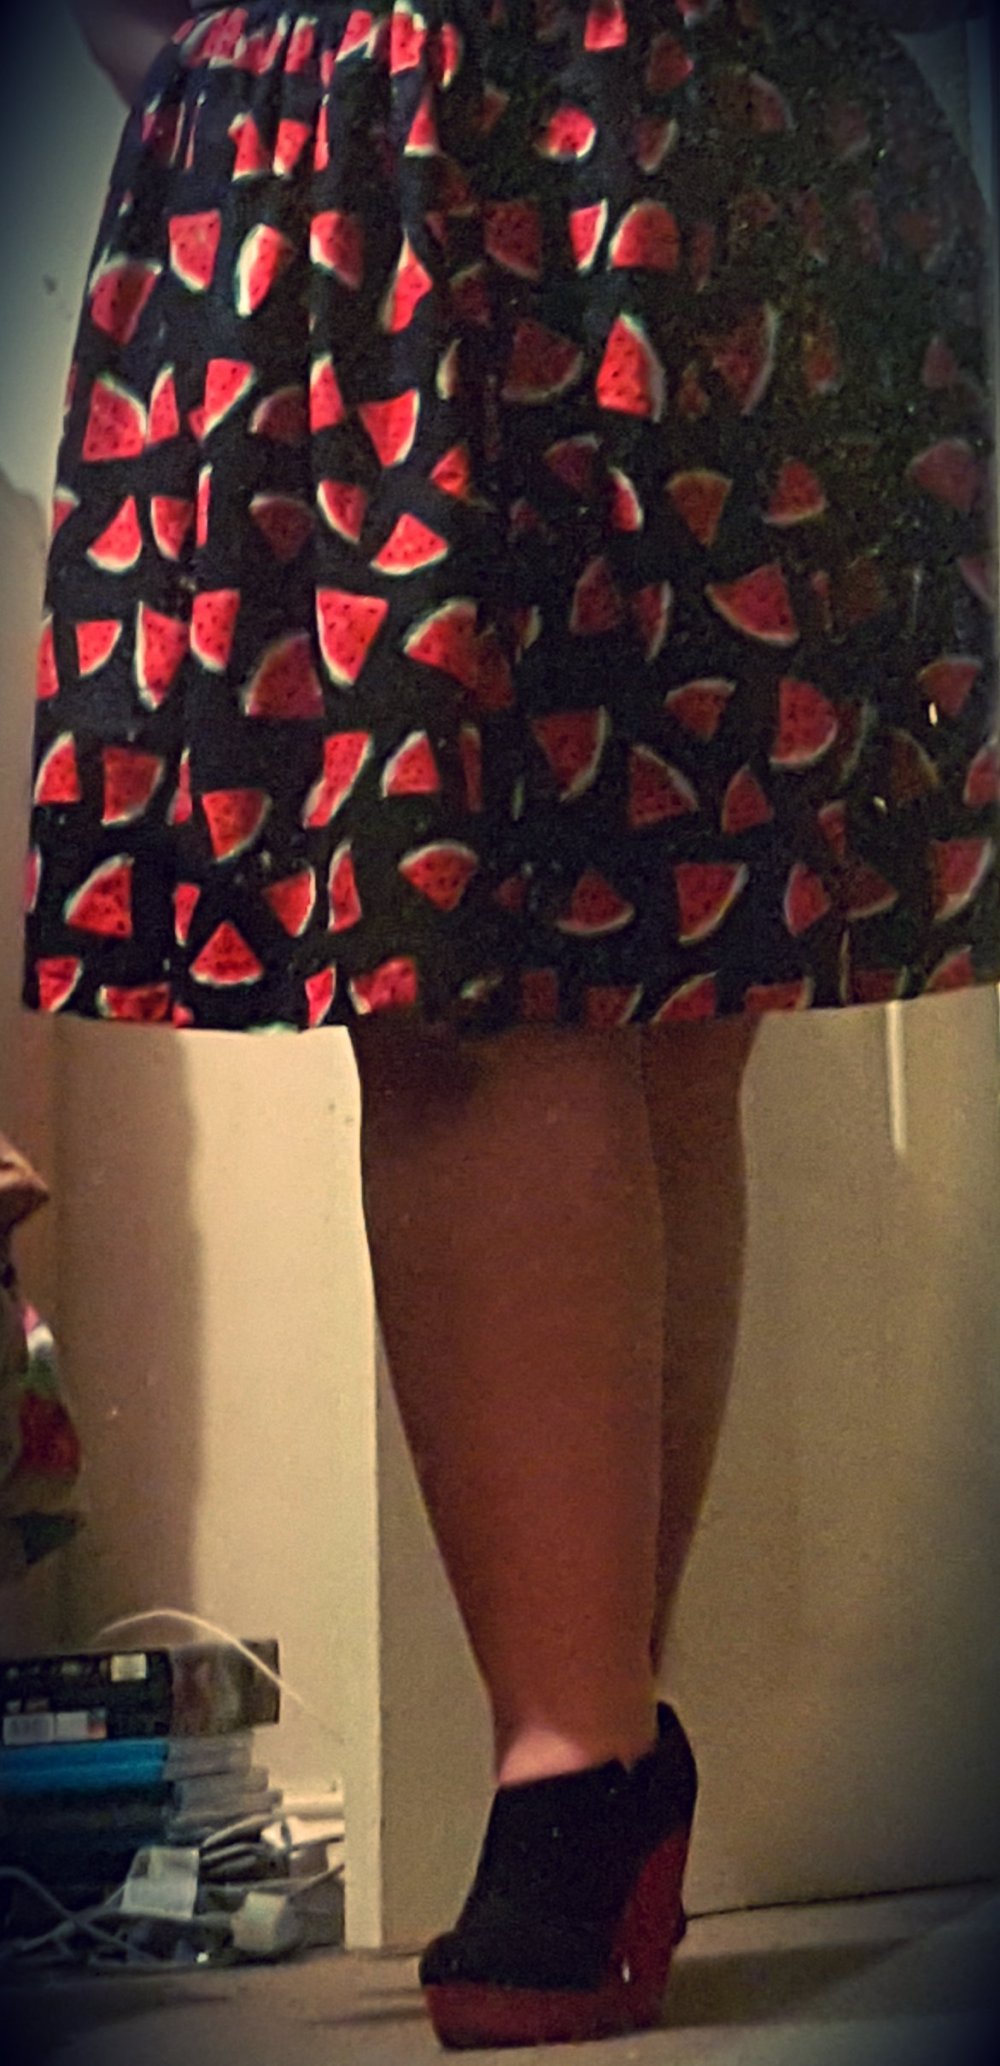
So as promised lots to catch up with since I last posted. I’ll try not to waffle on so here’s a few photos to summarise the rest of my 2018.

๐ŸฆŽFirstly the sad news.

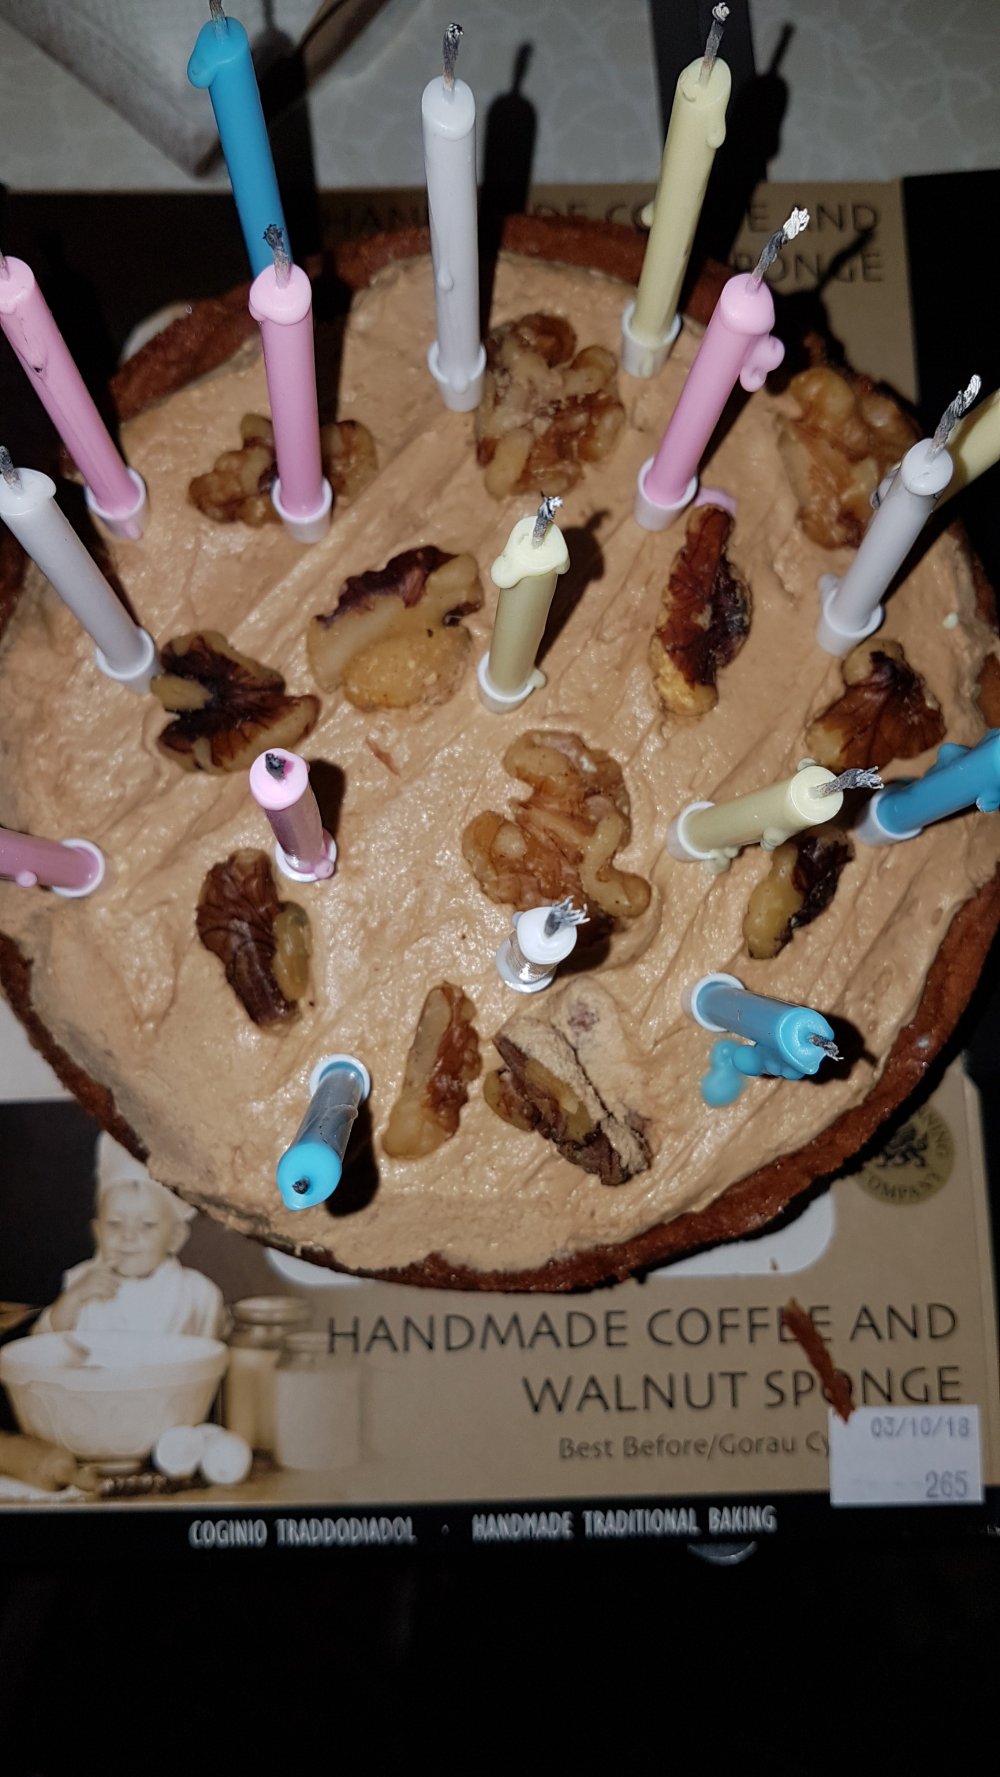
In August our girl Leela passed away.

We had her for 9 years so it was really tough to say goodbye. I laid her to rest beneath a pretty plant, I still miss her every day ๐Ÿ’š but she was loved and had a good life.

In September I went to an event for the launch of the Guilty Feminist book.

I’m a big fan of the podcast. It was a fantastic night plus I got to meet Deborah ๐Ÿคฉ

For my birthday we went our traditional camping trip

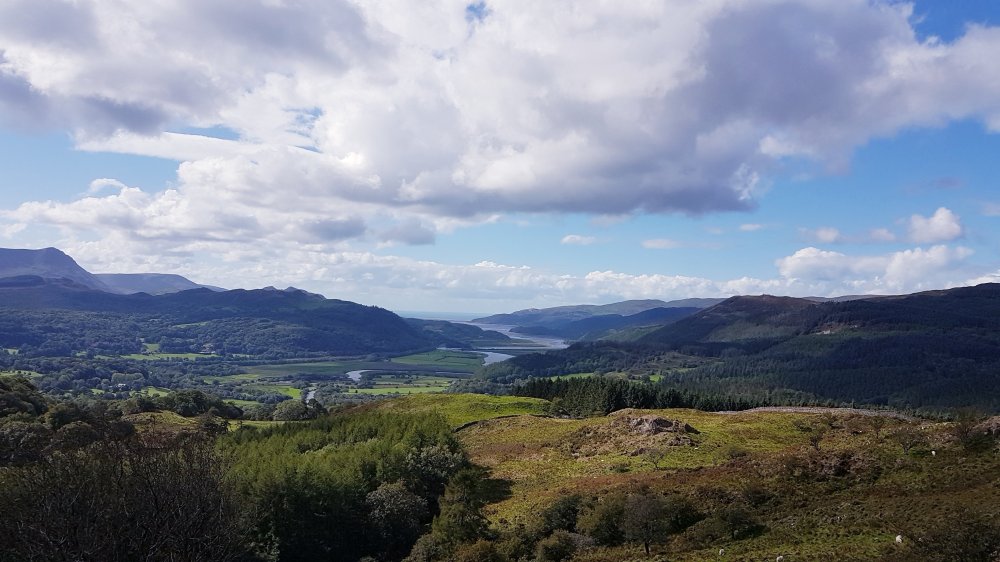
It was a great little break at our usual site in North Wales.

We also went to see the Terracotta Warriors at Liverpool museum.

It was an amazing experience and I’m so glad we got to see them before the exhibition ended.

In October I went to see First Aid Kit. They were supported by The Staves. Both acts were stellar ๐Ÿ˜

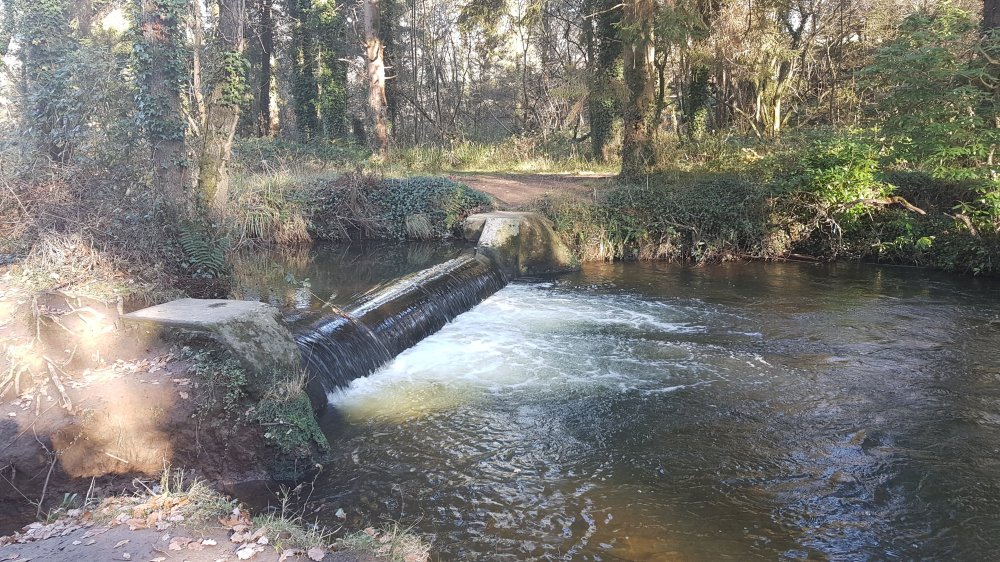
In November we went to visit friends in Swansea.

We took a walk in the woods.

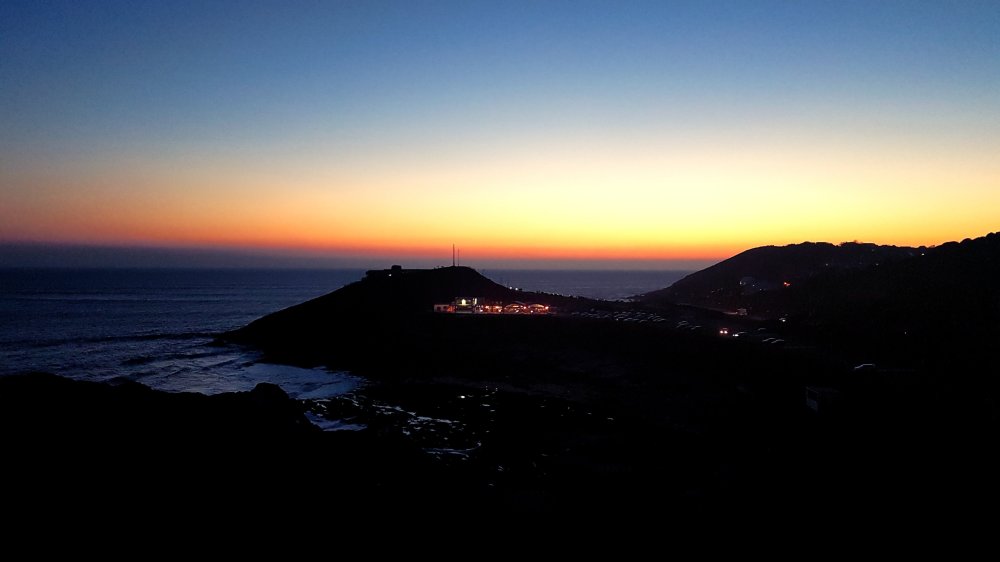
And watched the sun set over Bracelet Bay.

We had a nice little Christmas..

And a quiet new year.

January has flown by and here we are mid February already!

And that’s me caught up ๐Ÿ˜Š

Last but not least

๐ŸŒผThe new series of the Great British Sewing Bee starts tomorrow night on BBC2!!!! Who’s watching it? Really great to see it back!

Here’s to a happy fulfilling 2019!!

๐Ÿ’œ๐Ÿ’œ๐Ÿ’œ

My sewing mojo’s back!

I haven’t been sewing as much of late and I was definitely feeling a lack of inspiration/patience with the craft. The last thing I made before today was around the end of June and I havent even blogged about it ๐Ÿ˜ณ

I started a new job role in July, it been pretty brain intensive and I just haven’t felt like taking on any sewing.

My last post was the lovely tropical Be Bold blouse. A few days after that post I attended my work annual Summer party. I had been thinking for some time that I wanted to sew my own dress for the party.

At first I really couldn’t decide what to make. I flirted with the idea of winging a woven circle skirt and jersey bodice combo. I scoured online for something suitable but in the end I went back to Be Bold.

Its easy to make, its woven but theres no darts or other scary shaping. It’s a loose fit style and off the shoulder, perfect for a party in a heatwave where I would inevitably get too hot.

You may remember this lovely dress I made back in Feb. I just fell in love with the fabric so i couldn’t resist using it again.

Ta dah!


I’m not really sure why I decided to do the ruffle plain on one side. I figured you could wear it both ways round although I wore it with the black ruffle at the front for some drama.

It was so comfy for the party, the bar was sweltering and I was glad of my loose fit dress but still felt glam all night. ๐Ÿ’–

Trendsetter

This weekend I was determined to get some sewing in. I’ve had this stretch floral fabric for a little while now and Trendsetter by Ellie and Mac seemed a perfect match for it. It’s a really fast sew plus its got pockets!!!

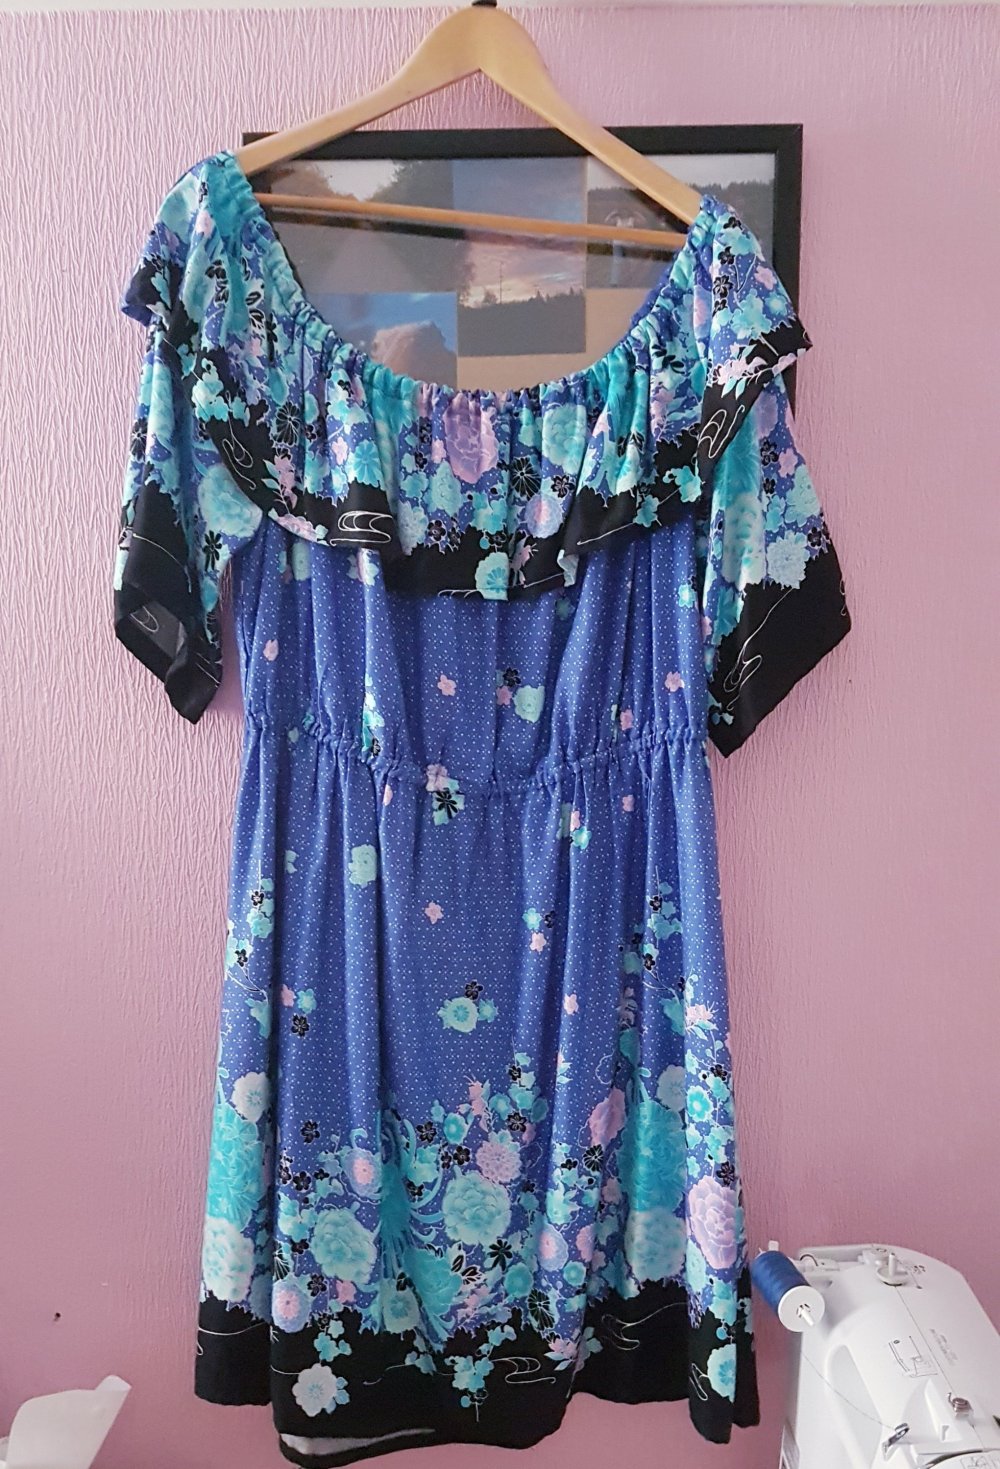
It’s a fab pattern and I would definitely make it again!

My mojo is back and I can’t wait to get onto the next sew!! ๐Ÿ’–๐Ÿ’–๐Ÿ’–

Be Bold

I recently discovered Ellie and Mac patterns via this blog post. How lovely is this Be Bold top by Margarita on the Ross?? Gorgeous fabric choice!! The pattern was on sale so I thought I’d give it a go.

Be Bold is an off shoulder blouse/dress pattern for woven fabric. There are various sleeve lengths, body lengths and optional additions of a ruffle and/or a sash.

My first attempt was using fabric I repurposed from an old skirt. It was a dirndl with an elastic waistband. There was quite a bit of fabric once I took the waistband off. Its a pretty rose print so a summer top seemed perfect. I had to do the cropped version just due to the length of the fabric.

The top was so quick to make. I added ties to act as straps and Ive since elasticated the hem.

Its pretty but I havent found the perfect outfit for it yet.

My second attempt was much more successful.

Such a pretty fabric!

I did the tunic length this time and elbow length sleeves again. The top can be worn on or off the shoulder and the fabric drapes beautifully . Thanks to my “first draft” version this was a hassle free make with no issues at all. I’ve already worn it half a dozen times.

I really love Ellie and Macs patterns. Ive bought several others already. They are affordable and easy to follow . Like Patterns for Pirates, they have a variety of body types showcasing each pattern and come in a good range of sizes.

I can definitely see myself making this again in future!

In Other News

๐Ÿ‡The sewing room has had a little makeover and I now have a lot more space. Excuse the mess, I am not a tidy sewist! #sorrynotsorry

๐Ÿ“I’ve been listening to many episodes of Love to Sew . Its an excellent sewing podcast presented by the wonderful Helen (of Helens Closet) and Caroline, founder of Blackbird Fabrics.

๐Ÿ‰ I actually bought plain fabric in my last haul. I know!! I’m shocked too๐Ÿ˜‚. Watch this space to see what comes of it ๐Ÿค—

Until next time

Happy Sewing/ Yarning /Living/Lovingโค

Summer’s Here!

Its been utterly glorious (bar the odd rainy day) for the past month๐ŸŒž๐ŸŒž๐ŸŒž. Rain or shine though, either is good for a day of sewing.

I’ve got a few new bits to show you. Firstly I re-made the Classic Mens Tshirt for A in a better quality fabric. It turned out great! It fits and has survived several washes. I learned a few lessons from the last one too (add extra length for one!)

How nice is that green space dye?!? We’ll just call the other one a practice tshirt eh?

Second I finally used my lovely blue stretch crushed velvet. I had dreams of making a sweatshirt out of this but didnt have enough of it. So instead I made P4P’s Cross My Heart cami. I just opted for the basic version with a v back, and without any extra decorative straps. This was because I’ve never worked with this kind of fabric before and I didnt have a surplus. I think it turned out pretty well.

Its a teeny bit too big so I might grade between two sizes next time. But it still looks nice on.

Lastly I’ve just finished my first Cocoon Cardigan. Another P4P pattern which I’ve had my eye on for a while. I chose the tunic length with 3/4 sleeves and patch pockets.

This has been a little adventure. It all went perfectly until I came to hem the sleeves. I let the iron get far too hot and melted the end of the sleeve. Cue me cutting 2 1/4 inches off each sleeve and adding cuffs to get the length back! Now cuffs are on option in this pattern but I didn’t have enough fabric to make the size required ๐Ÿ˜ฃ I basically made them as big as the scrap fabric would allow and hoped for the best. I’m more than happy!!

Saved!! The sleeves sit exactly where I always yank my cardi sleeves up to! And check those pockets!!

I’ve also discovered the overlock stitch on my machine. The seams on this cardi looked so messy because of the number of fabric layers but not now….

I’m definitely converted!!

Finally I went fabric shopping today. Here’s a taster….

You might spy a familiar fabric there, I couldnt resist buying some more ๐Ÿ˜‰

Til next time

Happy Crafting โคโคโค

โคNew Machine!โค

So this month I finally got a new sewing machine.

I went with the Brother Fs40, a very reasonably priced computerized model. It’s so quiet and quick. I love it!

The first project I did with it was just a little alteration. This sheer top has a crossover neckline and an under bust tie. The top has always felt slightly too small and as it stood the tie was sitting across my bust instead of under it.

I unpicked the shoulder seams and added two fabric panels. It was surprisingly easy and the top fits great now. I think it looks really good and you can’t really tell its been altered.

About a month or so ago I treated myself to a couple of P4P patterns and here’s one of them. The Boundless Knit Dress. I’ve used a lovely tropical print jersey which drapes beautifully.

It was relatively easy to make. The pattern calls for you to line the bodice which removes the need for any hemming or banding on the neckline. However I didn’t have any fabric for this so I opted to make a bound neckband. I used a tutorial from Melly Sews and it turned out perfectly! I am so happy with this dress. I can see its going to get a lot of wear this summer!

Ps How cute would the bodice look as a crop top?!? ๐Ÿ˜

Upcycle Project

A little rescue project. I’ve had this dress for many years and even at my slimmest it was slightly too small. But that skirt material ๐Ÿ˜๐Ÿ˜ . I couldn’t bear to part with it. So now i have a fab new skirt!

I unpicked the skirt from the bodice then created a new waistband. I’ve been salvaging buttons, elastic and zips from any old clothes I throw out. So I used some elastic from a bleach stained pair of harem pants.

I chose to do the fold over type , mainly because the elastic was a struggle to stretch whilst still sewing in a straight line. It means the skirt is a bit shorter than planned, but I’m still happy with it.

I might even see if i can unravel that bodice!

Weekend Update

I couldn’t resist this lovely remnant piece on my last fabric shopping trip. I love the dusky mauve colour and understated floral print. I figured at the least I could hem it and have a pretty scarf.

I’ve wanted to make my own kimono style cardigan for a while but I wasnt sure this was enough fabric. After watching a few videos I settled on this one by Mighymannie.

My sleeves are a few inches shorter than hers because I just didn’t have the width of fabric. In the end I cut very little off to make my T shape. None the less I’m really happy with how it turned out. I’ve trimmed the sleeves with dusky pink lace.

I’ve also done a little upcycle with an old mens jumper. It’s 70% lambswool so it seemed a shame to throw it away but I found it a little shapeless as a jumper. I just cut straight down the middle and hemmed it. Then I cuffed the sleeves as they’re too long.

Now I have a cosy slouchy cardigan!

It’ll be simple she said…

A Classic Mans T-shirt… easy right?

Yeah that’s what I thought when I said I’d make it. After working with woven, going back to jersey was …challenging. To clarify the pattern and instructions were fantastic and not the cause of any of my issues

It started when I cut out the pattern pieces before realising I should have added some extra length just in case. Oops.

The neckband was a breeze, its the bit of this project I’m most proud of.

Cut the fabric on the bias and it turned out so much better than previous tops where I hadnt. Lies flat and doesnt look stretched.

The side seems were the start of my machine issues. Had to rethread several times and change the needle – can you believe this is the first time I realised my packs of jersey needles were different sizes????? ๐Ÿ˜ณSettled on a 90/14 from looking at advice online.

Setting in the sleeves went really well, first time I’ve done this. It was easier than I thought.

Problems re occurred when I came to do the hems. The zig zag stitches look straight and the contrasting thread I was using really showed up the poor stitching.

Had to unpick the whole lot. Sadly some slight fabric damage ๐Ÿ˜”

Redid them in a closer matching thread which looks much better. Still not sure what’s going on with the machine but to be fair it does need replacing. All in all there’s a lot of positives to take from this project and I would definitely make it again. Best of all, A is really happy with it. And isnt the most important thing? โคโคโค

It’s got pockets!

I knew when I found this tutorial I had the perfect fabric for it. The Picnic Blanket Skirt by Tilly and the Buttons is a fab no pattern tutorial, you just need your own measurements. It’s given me a few “firsts” including using interfacing and making pockets. Yes ladies its got pockets!

The tutorial is really easy to follow and I’m looking forward to making many more of them.

It’s very full which suits the retro fabric. I may use less fabric next time and plain instead of print, for a more “everyday” kind of skirt. The pockets turned out perfectly and are just the right size.

I am really enjoying working with wovens, I’ve only really used knits so far on clothes. My next project is a classic man’s tshirt though so it’s back to the stretchy fabric!

Here’s some pictures I took during the making of the skirt.

Please excuse the bad lighting in the last picture, its a mirror selfie!

Drum roll please

Latest addition to my wardrobe โค Its turned out beautifully and I’m so so pleased.

The pattern is by Straight Stitch Designs and can be found here.

I’ve added 4 inches to the length as it was a little too mini for me. I’ve also deepened the neckline by two inches.

This my first time using woven fabric (on a garment) and the first time I have ever done bias binding.

As you can see from the pictures I didn’t use the crochet inserts (maybe next time).

I cut the two insert pieces vertically for contrast. They go across the shoulders and sleeves.

It looks great on and I’m looking forward to wearing it!

โคโคโค